安装/11.0 DVD 安装
这是从DVD光盘安装openSUSE 11.0的一个指南。对于大多数用户这是一个基本安装步骤的概况。如需详细资讯,请参阅安装网页上如何在特殊的平台安装openSUSE,并在安装帮助页面获取更多信息。
This is a guide on installing openSUSE 11.0 from the DVDs. This is a basic overview of the installation steps for most users. For more information, please refer to the Installation page on how to install openSUSE on specific platforms, and to the Installation Help page for more information.
Contents
安装
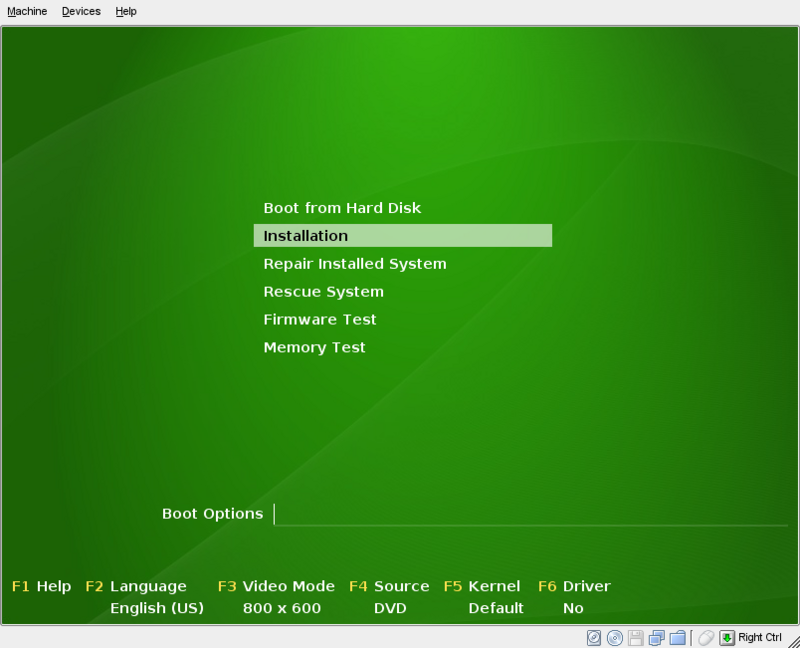
将您的openSUSE光盘放置到驱动器里,并重新启动计算机。在重启之后,你将会看到的启动画面boot screen。
Place your openSUSE disc in the drive, and reboot your computer. Upon rebooting, you should encounter the boot screen.
选择 安装Installation然后等待openSUSE的安装和配置程序YaST加载。
Choose Installation and wait for YaST, the openSUSE installation and configuration program, to load.
步骤1:欢迎屏幕
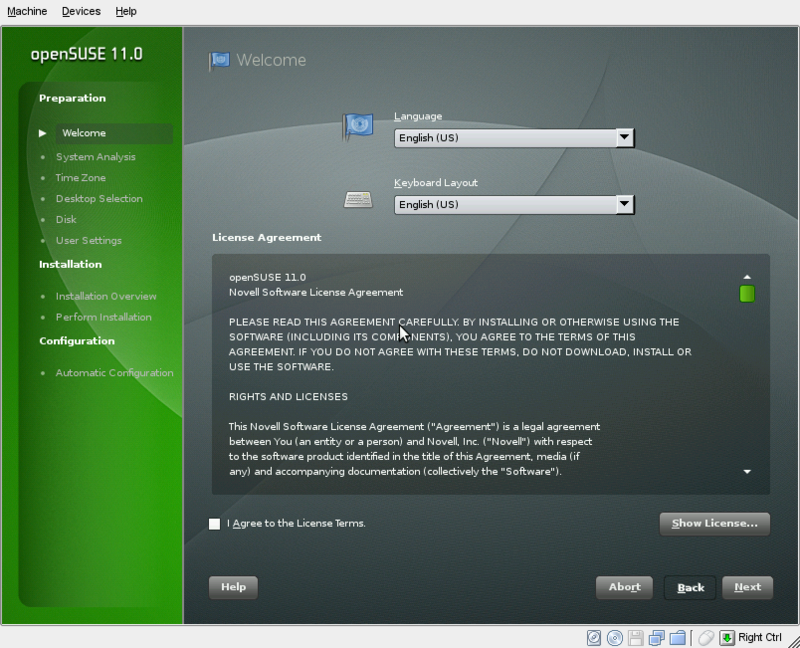
Yast将呈现在你的屏幕上。所有YaST的页面遵循相同的界面:在左侧的菜单显示您安装进展,在主画面显示不同的功能,并且位于底部有相同的 帮助, 中止,返回 和 下一步 按钮。
YaST will present you with the screen. All YaST pages follow the same interface: a list of where you are in the installation on the left, different functions in the main screen, and Help, Back, Abort, and Next buttons at the bottom.
在此画面选择您的语言。键盘布局是自动设定取决于语言。如果您的键盘布局是不同于 YaST 所选择,返回并自行设定来纠正它。 此外,您需要接受许可协议。单击 查看许可证,将展开 许可协议。 一旦你接受许可,单击下一步。
Choose your language in this screen. The keyboard layout is set automatically depending upon the language. If your keyboard layout is different from the one chosen by YaST, go ahead and correct it.
Also, you'll need to accept the license agreement. To expand the license agreement, click Show License. Once you accept the license, click Next.
[ja:Installation/11.0_DVD_Install]
步骤2:系统的分析
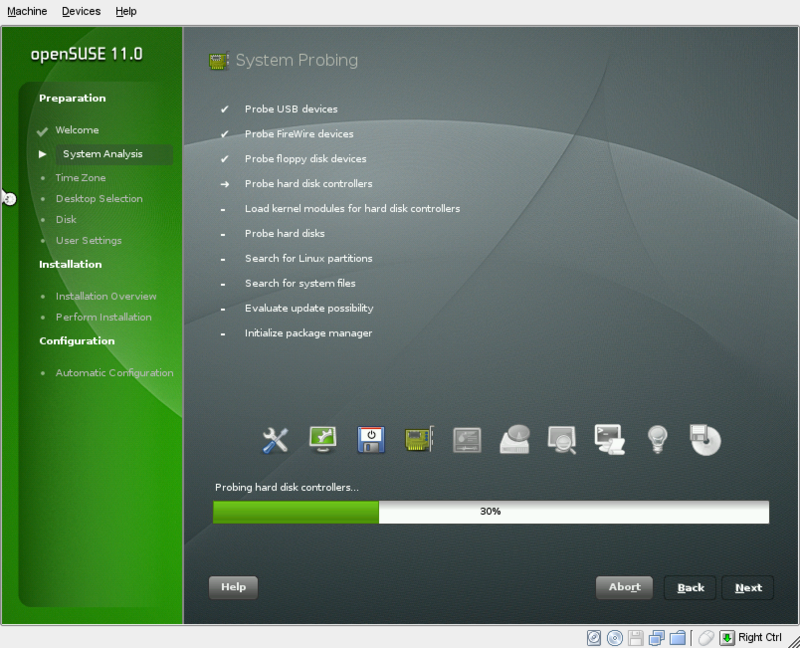
YaST现在开始分析您的计算机,来决定它安装所应当使用的设置。
YaST will now analyze your computer to determine the settings it should use for installation.
您可以等待它自动完成。
You can simply wait until it is finished.
步骤3:安装模式
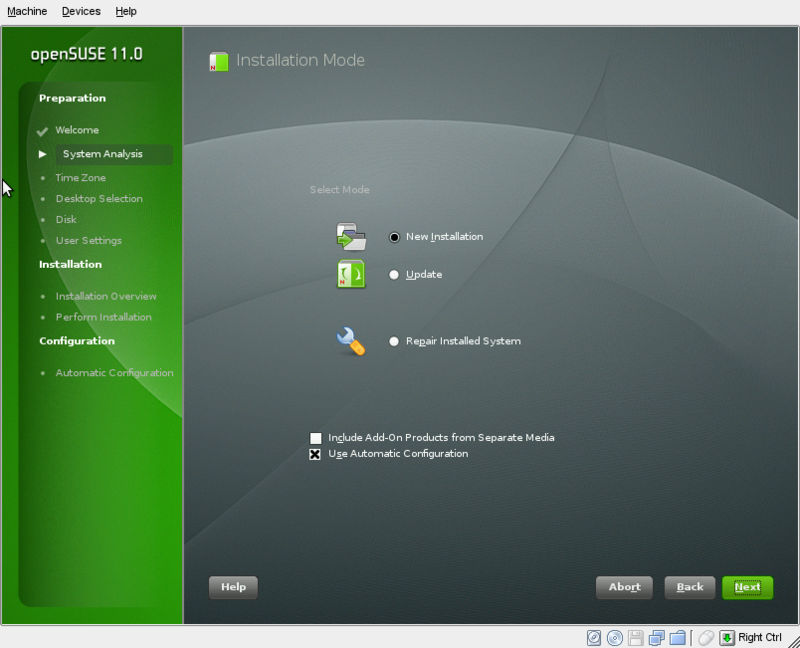
现在,您可以选择openSUSE 11.0 的安装模式。
Now you can choose between installation modes of openSUSE 11.0.
大部分使用者只需要保持默认安装就可以了。如果您有安装早先版本的openSUSE,您可以选择更新将版本升级到 openSUSE 11.0。如果您需要修复您的安装openSUSE 11.0 ,修复安装系统选项可以用来评估和修复您安装的 openSUSE系统。
如果您想要自定义调整 整个的安装设置,包括硬件配置,您可以取消使用自动配置。只建议那些知道应该怎么设置的用户这么做,而且这会增加安装openSUSE 11.0所花费的时间。
Most users should leave the options set to what they are. If you have a previous version of openSUSE installed, you can choose Update to upgrade that version to openSUSE 11.0. If you ever need to repair your installation of openSUSE 11.0, the Repair Installed System option can be used to assess and repair your installed openSUSE system.
If you want to fine-tune how the entire installation is set up, including hardware configuration, you can uncheck Use Automatic Configuration. This is recommended only for those who know what they are doing, and it also extends the time it takes to install openSUSE 11.0.
步骤4:设定时间与时区
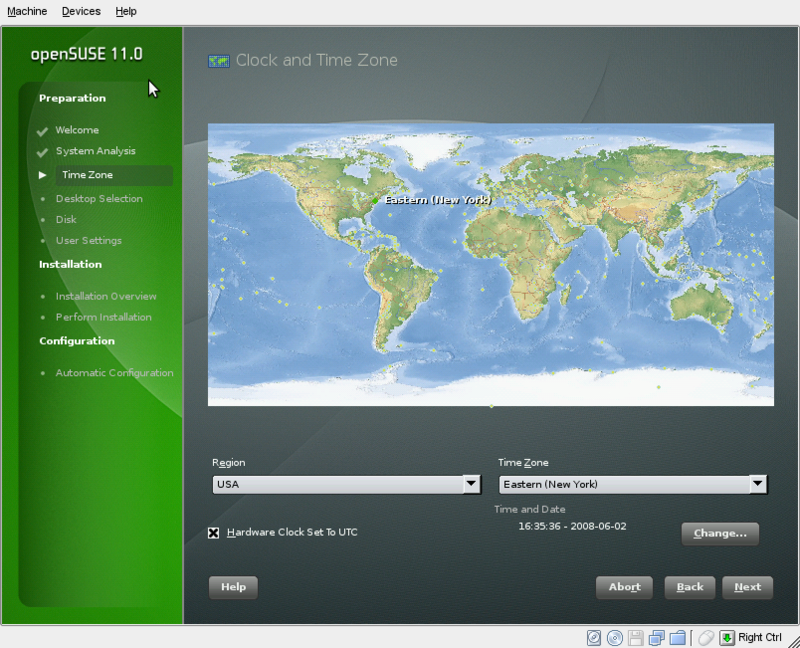
之后,您将带到一个有一幅地图的屏幕上。 这是让您调整时钟的时区信息。
After that, you will be brought to a screen with a map on it. This is where you will give your time zone information for the clock.
放大您所在的地区,然后选择代表一个城市的一个圆点,或者是最接近您的位置,或任何一个在您的时区的位置。你可以在底部确认这些设置。 如果在时间和日期的时区是不正确的,选择更改...来调整。
Zoom in on your region of the world, then choose one of the cities with a dot on them, either the closest one to your location, or any one in your time zone. You can confirm these settings at the bottom. If the time in the Time and Date section is not correct, choose Change... to correct it.
步骤5:桌面的选择
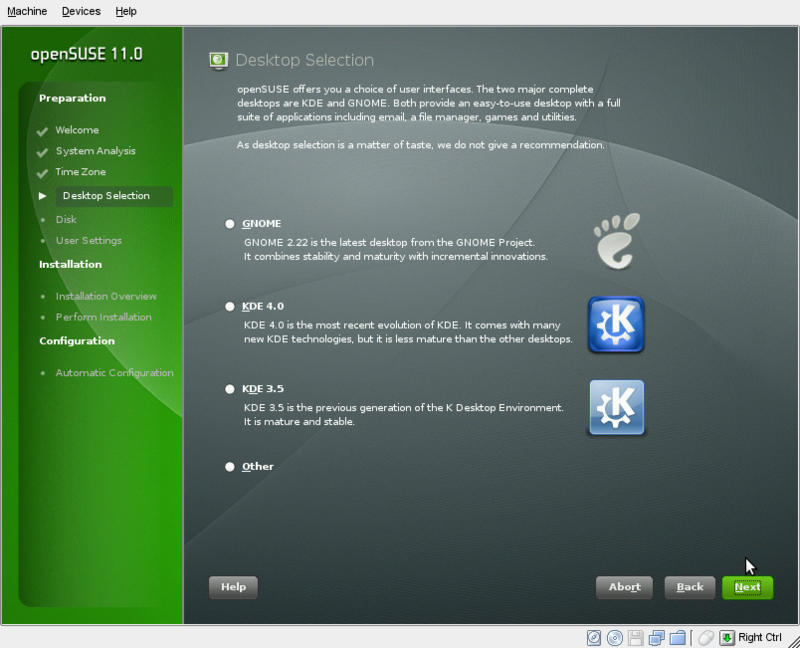
在这里,您可以选择您想安装openSUSE包含中的三个桌面环境之一。请记住,这只是最初的选择。稍后在安装过程中或甚至在您安装完成后,您可以继续添加gnome ,其他的KDE ,甚至更多如xfce 一样X窗口管理器。
Here you can select which of the three desktop environments openSUSE includes you wish to install. Keep in mind this is just for the initial selection. Later in the installation process or even after you install, you can add GNOME, the other KDE, and even more X window managers like XFCE.
既然是高度的个人选择,我们不给予建议。
Since the choice is highly personal, we don't give a recommendation.
事关个人品位,我们不予以推荐 :)
步骤6:设立您的磁盘
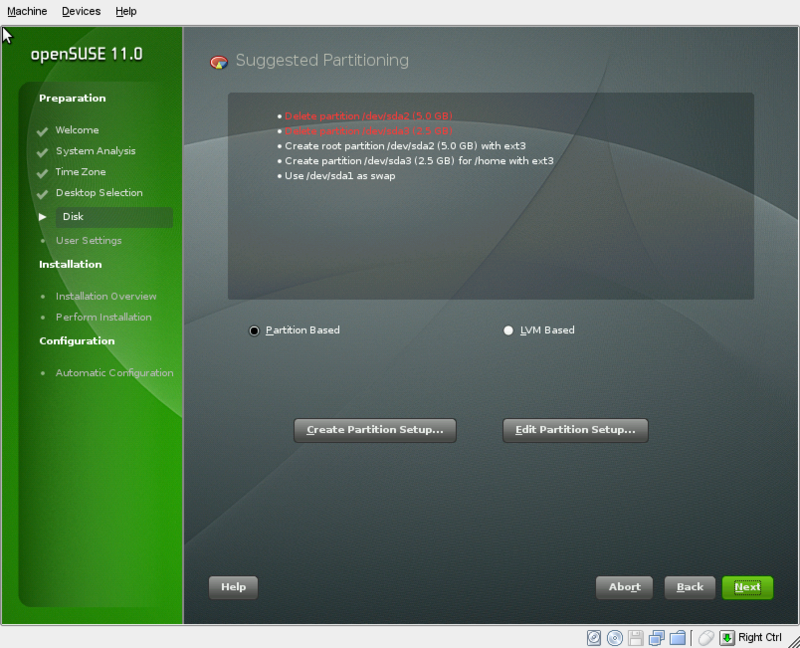
现在yast将设立您的硬盘驱动器的设置。如果您有其他的操作系统安装在电脑上(例如, Microsoft Windows或其他Linux),YaST 将调整该操作系统的空间,以便它仍然在您的计算机上,并且有足够的空间安装openSUSE 11.0 。
Now YaST will set up your hard drive settings. If you have another operating system installed on the computer (for example, Microsoft Windows or another Linux), YaST will resize that operating system so that it still on your computer, but has enough room to install openSUSE 11.0.
YaST提出设置应该适合大多数用户。如果您想要编辑建议的设置,单击编辑分区设置... 。如果您想要重新整个安装程序为自己的设置,单击创建分区设置... 。 如果您想要保留的建议设置,单击下一步 。
YaST should propose settings that will satisfy most users. If you want to edit the proposed settings, click Edit Partition Setup.... If you'd like to redo the entire setup for your own settings, click Create Partition Setup.... If you want to keep the proposed settings, click Next.
步骤7:创建您的用户
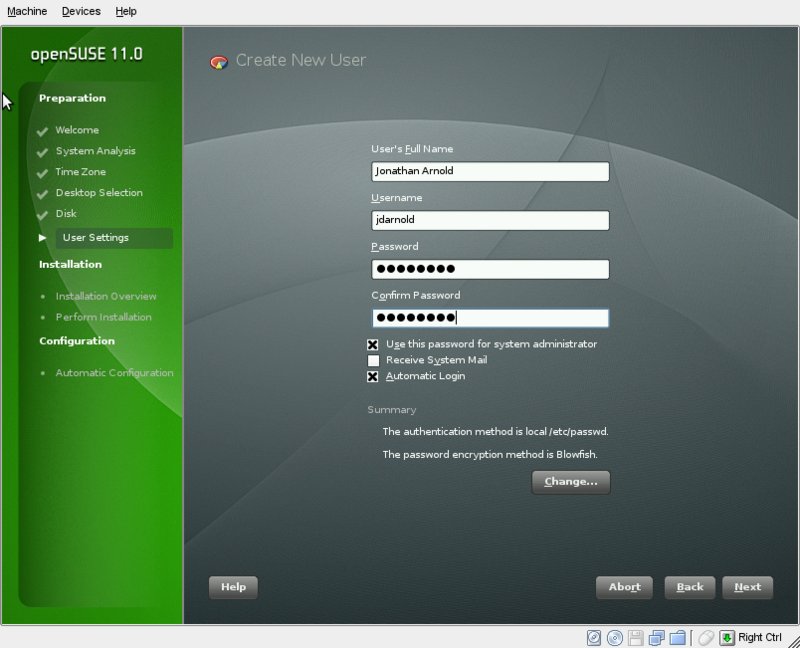
现在您将需要设立一个计算机的主要用户的用户帐户。
Now you'll need to set up a user account for the primary user of the computer.
输入您的全名,用户名(这是自动选择:如果您愿意您可以变更名称) ,和一个密码。
Enter your full name, a username (which is automatically chosen: you can change the name if you wish), and a password.
默认情况下,该系统选项是设置系统管理员(也称为root)密码同您的密码一样。此外,自动登录是打开的,就是说您的电脑开机后自动登录到你的系统。如果因为安全考虑,您愿意的话可以取消选中这些选项。
By default, the system is set so your password is the password of the system administrator (also known as root). Also, automatic login is turned on as well, which logs you into your computer automatically upon turning it on. You can uncheck these options for more security if you wish.
步骤8:安装概述
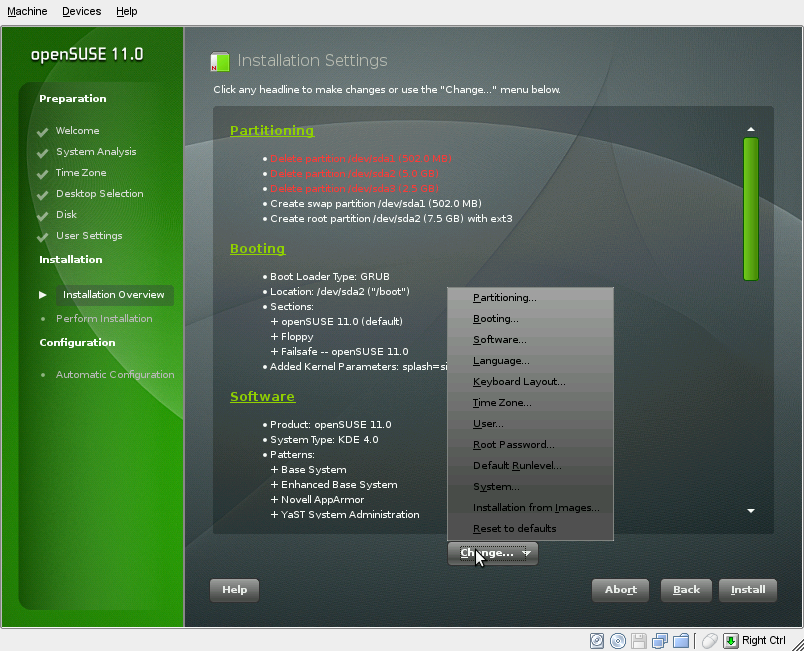
现在呈现在你面前的是安装的介绍。这些都是接下来 YaST 将为您的系统安装的细节
Now you are presented with the overview of the installation. These are the details to what YaST is going to do to your system upon installation.
要改变这些细节,选择 标题的选项 ,或选择更改...如图所示的菜单。
To change these details, select the headline of the option or choose it in the Change... menu as shown.
软件的变更
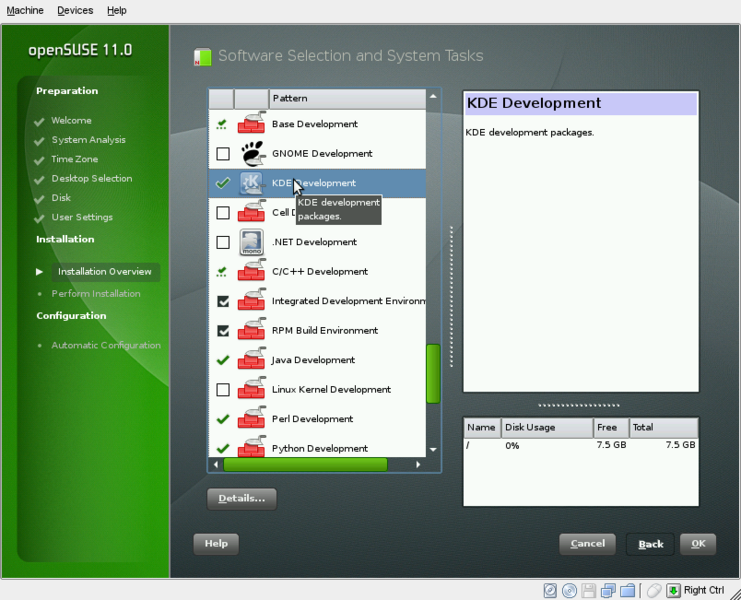
最常见用户想要改变的设置是软件。 在YaST ,软件是以模式安装,即相同作用的软件组。
默认选择的软件模块适合安装一个基础应用的openSUSE的,但你可能要添加额外的(例如,开发工具或额外的Office应用程序) 。 如果是的话,只要勾选在左边的模式。 磁盘空间允许的话,所有相关联的软件会随着剩下的系统一起安装。
The most common setting users want to change is software. In YaST, software is installed in patterns, or groups of software that achieve a similar goal.
The appropriate software patterns for a basic openSUSE installation have already been chosen by default, but you may want to add additional ones (e.g., developer tools or extra office applications). If so, simply check the pattern on the left. Disk space permitting, all associated software will be installed along with the rest of the system.
步骤9:安装openSUSE !
如果您准备好要安装,单击安装 。
If you're ready to install, click Install.
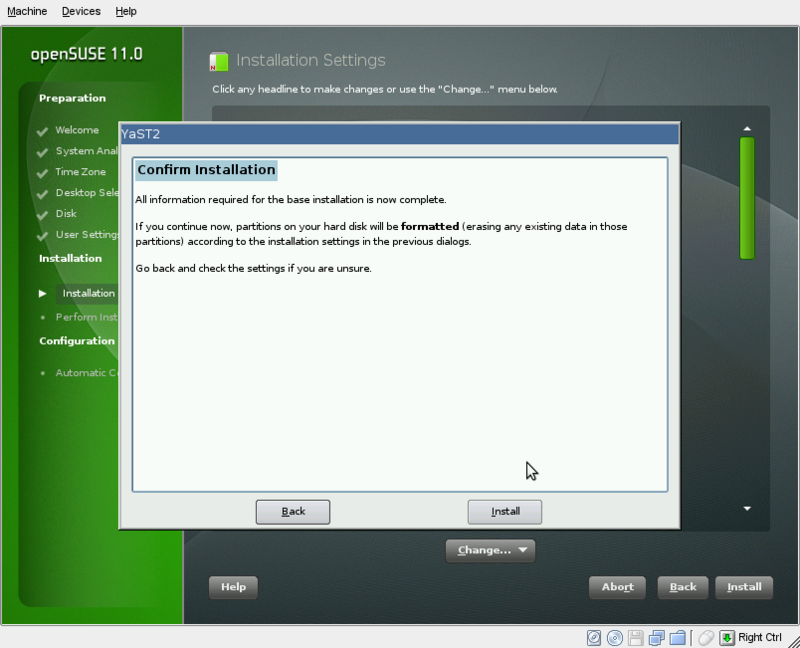
如果您想安装您会被再次要求确认,这一确认就返回不了.在您接受此对话框后,安装将开始。
You'll be asked again if you want to install. This is the point of no return. After you accept this dialog, installation will begin.
单击安装以开始安装。
Click Install to begin the installation.
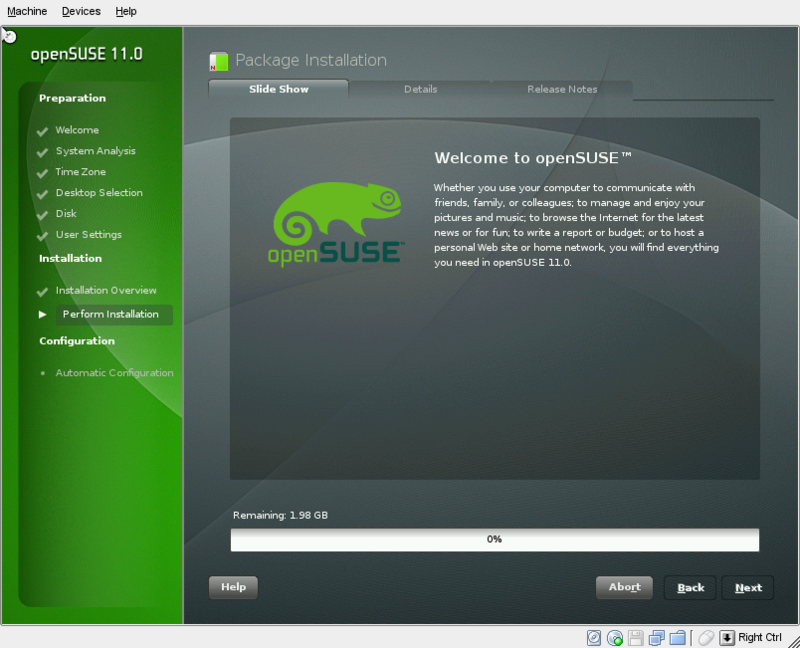
现在安装程序将开始openSUSE的安装。进度条进行时几个openSUSE的安装幻灯片会不断的闪过屏幕:
Now the installer will work to install openSUSE. Several progress bars will come and go, until you are at the openSUSE installation slideshow:
安装完成后,计算机将重新启动
After the installation is complete, the computer will reboot.
自动配置
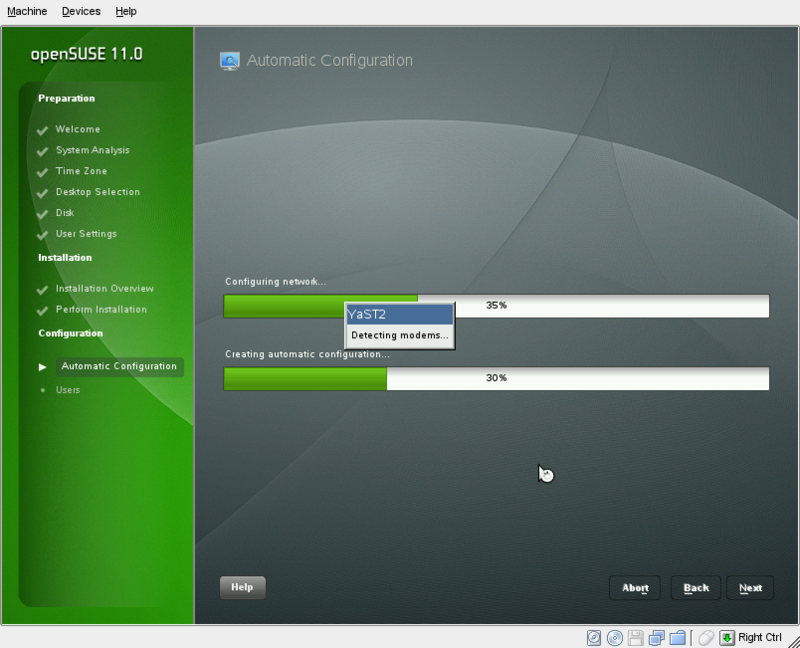
系统重新启动到您的新openSUSE11.0系统之后,安装就完成。 不过,之前您开始进入您的桌面之前,它必须运行自动配置来您的硬件和网络连接。
After the system has rebooted into your new openSUSE 11.0 system, the installation is over. However, before you can start your desktop, it must run a one-time automatic configuration of your hardware and network connection.
顾名思义,它是自动的。 在这里您不必做任何事情 。(可能要点击几下-_-#)
As it's name suggests, it's automatic. You don't have to do anything here.
完成安装
openSUSE 11.0 已经安装好了!一旦您登录后,迎接您将是openSUSE的greeter,还有各种信息关于openSUSE就资讯科技,您将被导向到设立您的在线更新系统。
openSUSE 11.0 is now installed! Once you login, you'll be greeted by the openSUSE Greeter with all sorts of information about openSUSE on it, and you'll be directed to setting up your online update system.
